This article will walk through to connect to the AWS cloud instance
using putty software from windows laptop. If you use MAC OS or Linux OS ,
you could easily connect to the AWS instance using the downloaded *.pem
key file from AWS Portal. pem key file format is not supported in
windows ssh client – Putty. You must need to convert the pem file as ppk
file using the putty keygen. Let’s quickly see that how to convert the
private key which is in pem format to ppk format using putty keygen. At
the last section , we will use the ppk file on putty ssh client to
establish the session with Amazon AWS instance.
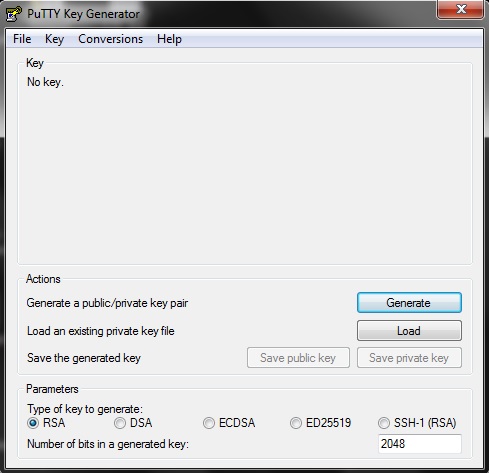
2. Open the putty keygen . Click on “Load” tab. Putty KeyGen
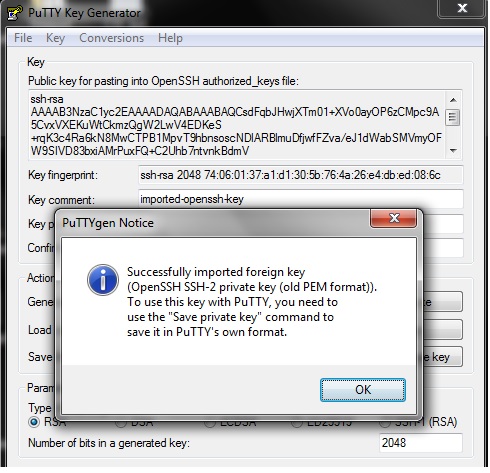
3. Select the downloaded pem file. (If putty keygen is just looking ppk file, just select “All files” ) Load the Downloaded Pem Key file
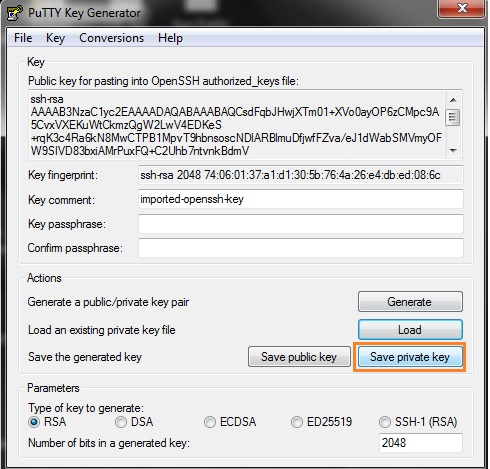
4. Save the private key which is converted in ppk format. Save private key – AWS
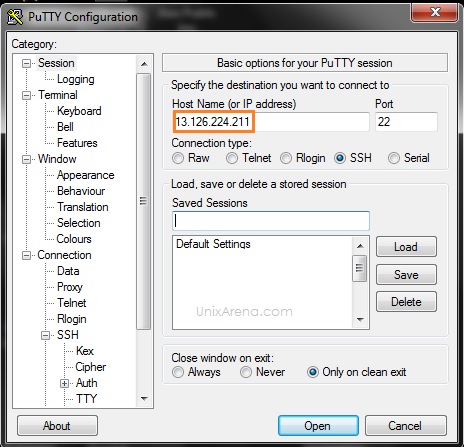
5. Open putty ssh client and enter the AWS EC2 instance public IP. Do not click on “open” tab. Enter the AWS EC2 Instance IP
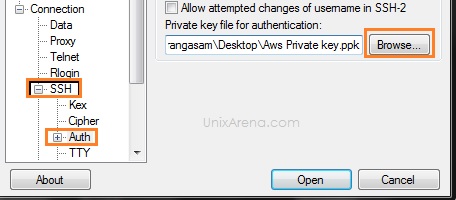
6. Load the private key (which is converted using puttygen) from SSH tab. Click on Open. Load the private Key prior to open the session
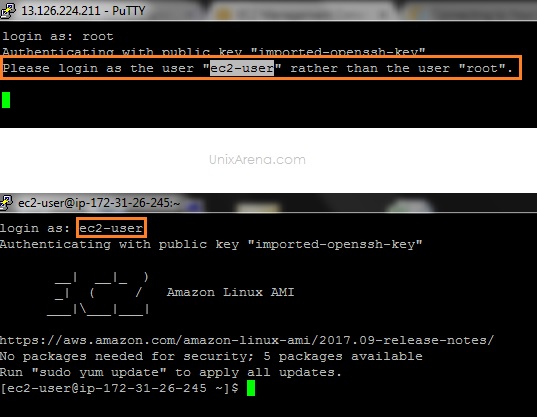
7. Try to login as ec2-user. If you try with root user, you will get warning message like below. Login as ec2-user
8. You could use “sudo su – ” to gain the root access for the instance.
All the pubic could instances are using the private to add the
additional security. Using the similar method, you should be able to
connect to any public could instances once you have the public IP and
private key file. Hope this article is informative to you.
No comments:
Post a Comment