This article will walk through that how to change the AWS EBS volume
type using snapshot feature. There is a limitation with AWS that you
can’t change the volume type on fly. You must need to halt the instance
and change the volume type. But again , you can’t switch to all the
volume types available in AWS using that method. As a workaround , You
can take the snapshot of the EBS volume and create a new volume using
snapshot with desired volume type. Once you have the new volumes ready ,
You can simply detach the old volume from instance and attach the new
volume. Let’s have a look at the demonstration .
1. Login to the AWS console.
2. EC2 instance is already in shutdown sate. We are going to change
the instance root volume from SDD IOPS to Magnetic storage. Since the
instance is in shutdown state, data on the volume will be more
consistent.
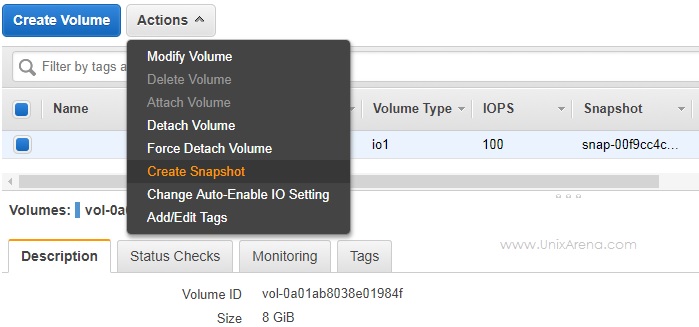
3. Navigate to the volumes tab in AWS console. Select the volume and click on “Create Snapshot”. Create EBS volume snapshot – AWS
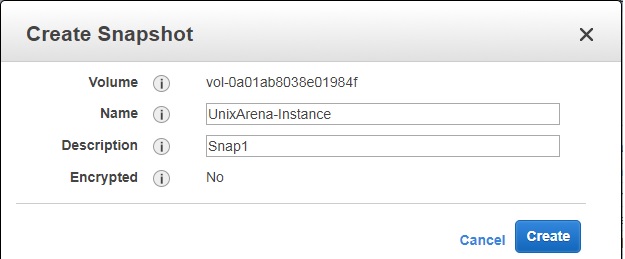
4. Enter the snapshot name for your reference and click on “Create” tab. Name the snapshot – AWS
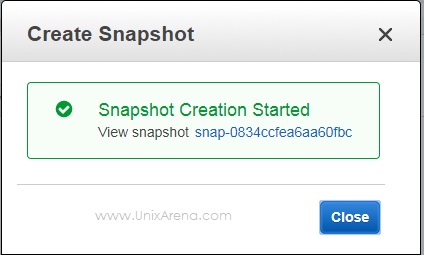
On the successful snapshot creation request, you will get message like below. EBS volume – Snapshot
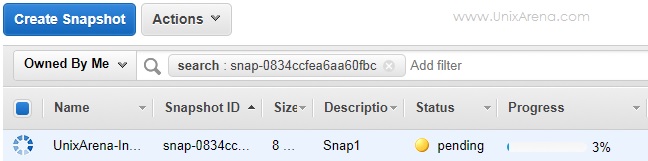
5. Navigate to the snapshot tab and look at the snapshot creation progress. In-progress – Snapshot – EBS
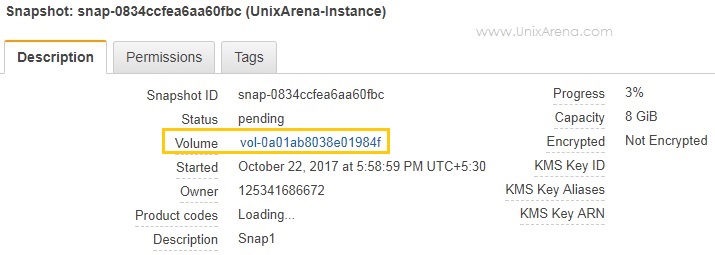
6. Check the snapshot description tab to see the origin of the snapshot that we have created. Snapshot Information – Volume
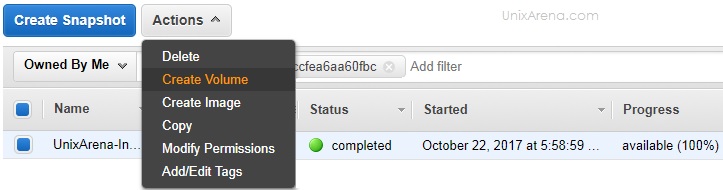
7. Once the snapshot is ready (progress tab), we will create a new volume with desired volume type. Create Volume from snapshot
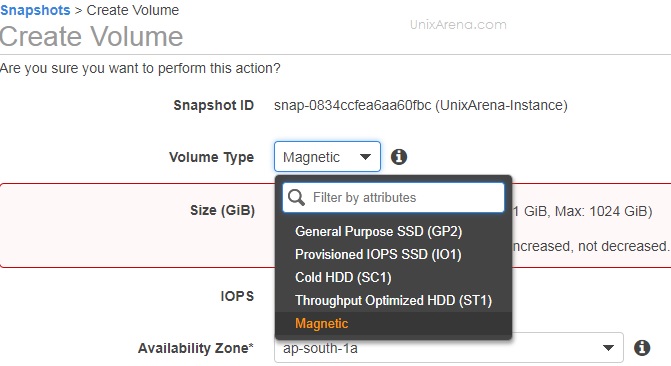
8. Select the desired volume type. Select the volume type – AWS
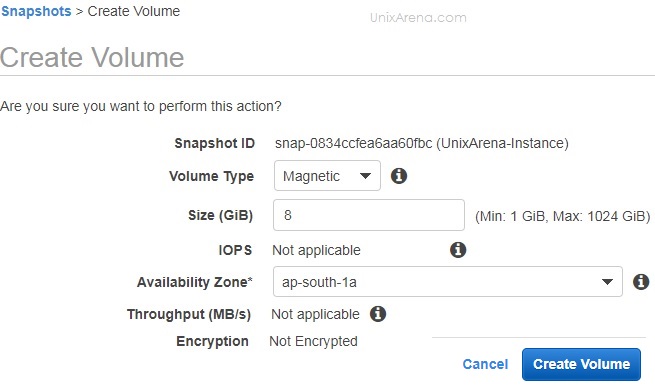
9. Enter the volume size same as source volume size or higher. You can,t give the volume size less than the source volume. Select the volume size as snapshot source size or higher
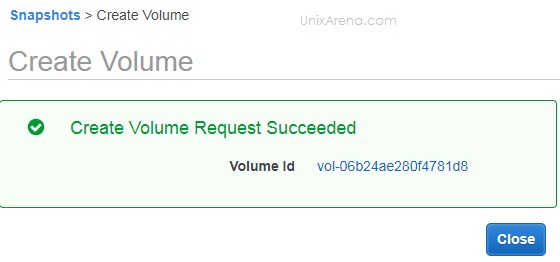
On the successful volume creation, you will get the following message with volume name. Volume Created – AWS
10. Navigate back to the volume tab and see the volumes. One is
source volume which is in SSD GP2 volume type. The other one is created
from snapshot which is in standard magnetic volume. New Volume created from Snapshot
We have successfully created the clone copy on new volume with
different storage type. Let’s see that to replace the volume for the
instance.
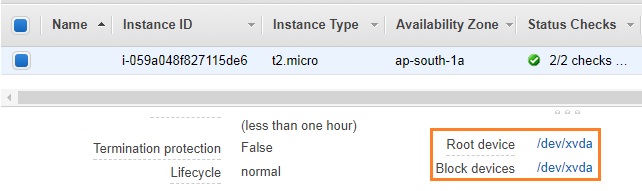
Before detaching the volume , you must find out the block device name
from the instance description tab. We need this information on step 14. Instance Volume Block Device Name
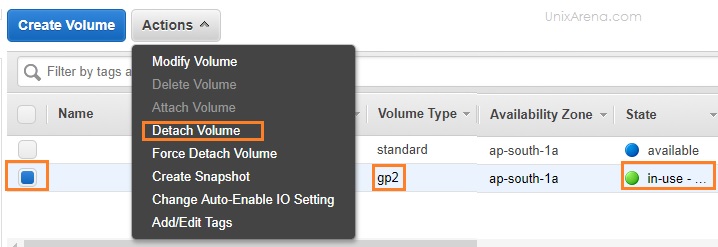
11. Detach the source (old) volume from instance. Detach the old volume from Instance
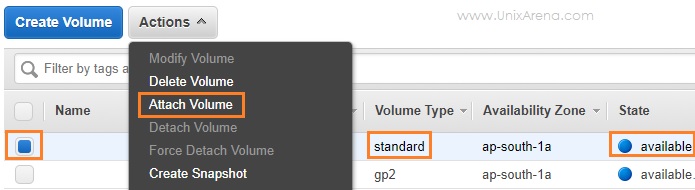
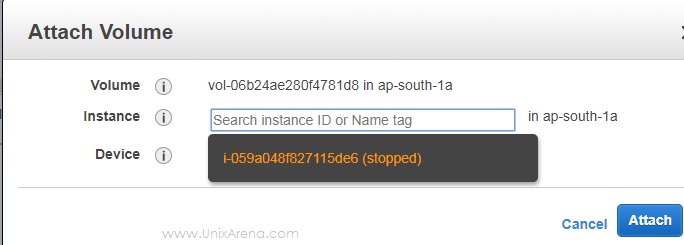
12. Select the newly created volume and attach it to the instance. Attach the new volume – AWS
13. Select the instance ID or tag. Select the Instance to Attach volume
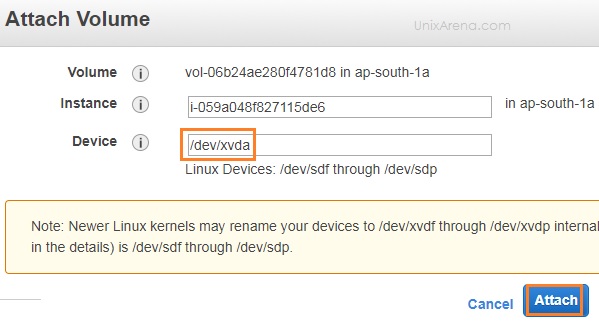
14. Enter the block device name which you have gathered before proceeding with step 11. Enter the correct block Device name
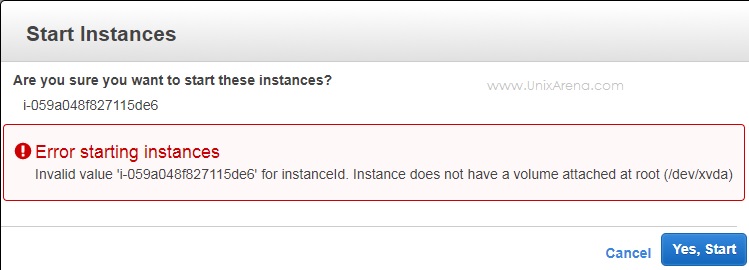
If you have entered different volume name than the source, you will get error like below while starting the instance. Invalid value for instanceId. Instance does not have a volume attached at root
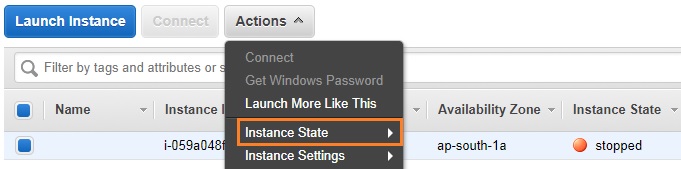
15. Go back to EC2 console and start the instance . Start the EC2 instance – AWS
16. You can see that instance s up & running fine. Instance is running with new volume type
17. Let me login to the instance and check it . AWS instance Up & running
After the sanity check , you are good to destroy the old volume from the volume tab. Hope this article is informative to you .
his article will walk through that how to change the AWS EBS volume
type from SSD GP2 to SSD IOPS volume type. Changing the volume type
is not straight forward for all the volume types. Due to the instance
limitation, you can’t change the volume type on the fly. You need to
halt the instance in an order to change the volume type. But you could
give a try to change the volume type while the instance is up &
running . 1. Login to the AWS Console and navigate to EC2 tab.
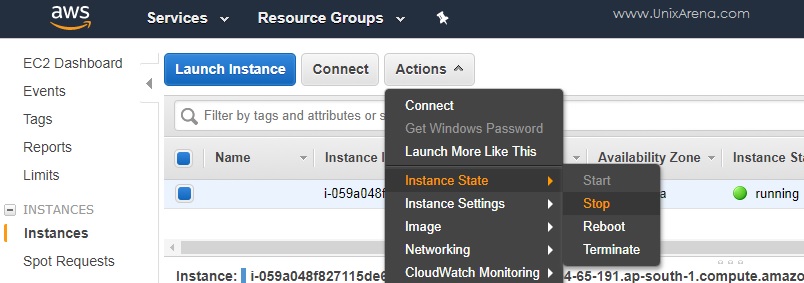
2. Stop the instance by clicking Action – > Instance State – > Stop. Stop the AWS instance
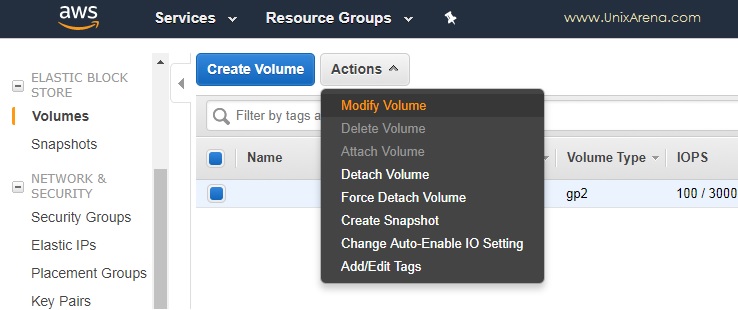
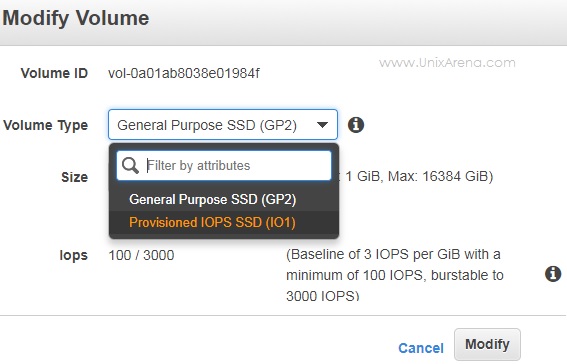
3. Navigate to the volume tab. Select the volume and click on modify from Actions tab. Click on Modify Volume – AWS
4. Change the volume type from SSD GP2 to SSD IO1. Change the volume type from SSD GP2 to SASD IO1
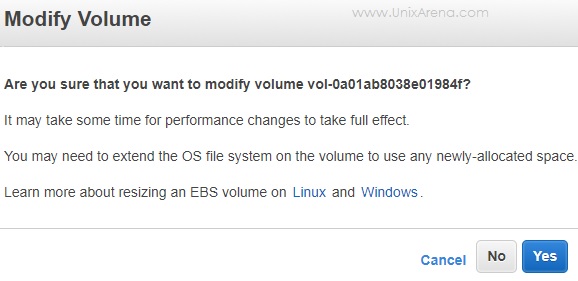
5. Click “Yes” to change the volume type. Click Yes to change volume type – AWS
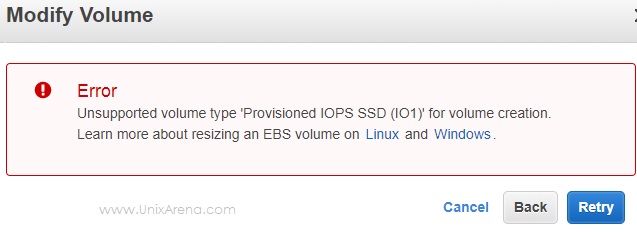
If you try to change the volume type without stopping the instance, it will fail. AWS on-fly Volume Modification Fails
If you have seen the above procedure , we can’t change the volume
type to any magnetic storage or other available storage types. We will
see that how to change the EBS volume to other volume types in next
article.
This article will walk through to connect to the AWS cloud instance
using putty software from windows laptop. If you use MAC OS or Linux OS ,
you could easily connect to the AWS instance using the downloaded *.pem
key file from AWS Portal. pem key file format is not supported in
windows ssh client – Putty. You must need to convert the pem file as ppk
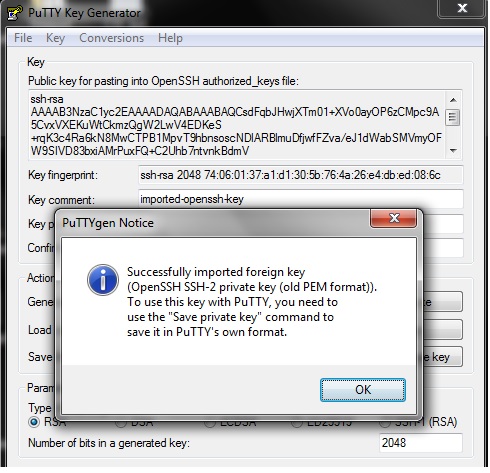
file using the putty keygen. Let’s quickly see that how to convert the
private key which is in pem format to ppk format using putty keygen. At
the last section , we will use the ppk file on putty ssh client to
establish the session with Amazon AWS instance.
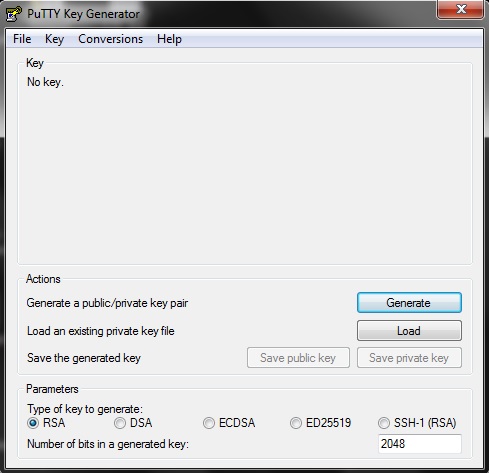
2. Open the putty keygen . Click on “Load” tab. Putty KeyGen
3. Select the downloaded pem file. (If putty keygen is just looking ppk file, just select “All files” ) Load the Downloaded Pem Key file
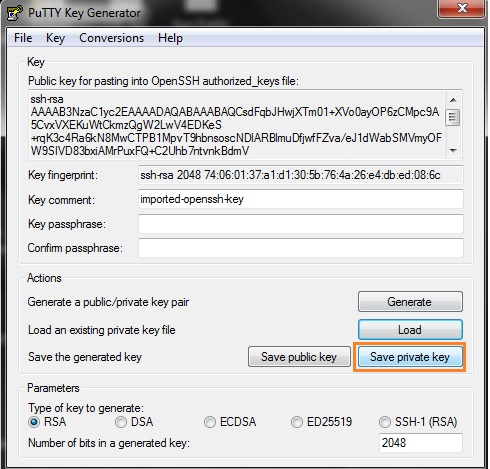
4. Save the private key which is converted in ppk format. Save private key – AWS
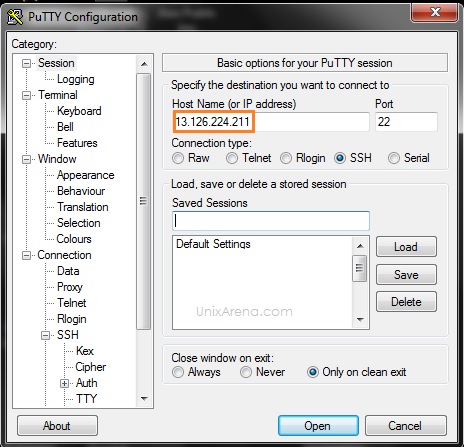
5. Open putty ssh client and enter the AWS EC2 instance public IP. Do not click on “open” tab. Enter the AWS EC2 Instance IP
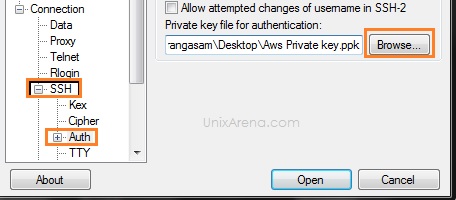
6. Load the private key (which is converted using puttygen) from SSH tab. Click on Open. Load the private Key prior to open the session
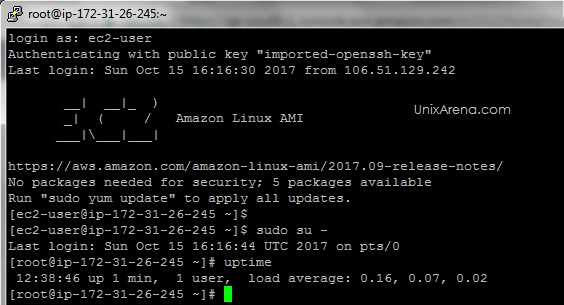
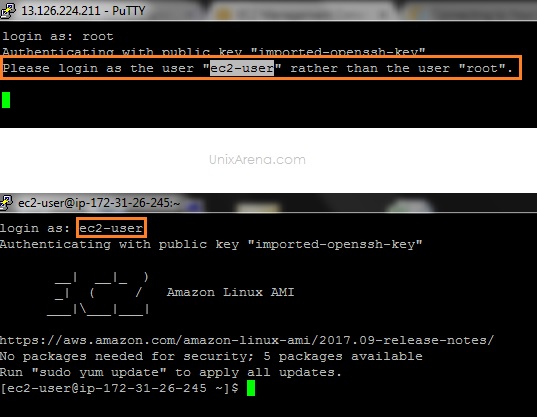
7. Try to login as ec2-user. If you try with root user, you will get warning message like below. Login as ec2-user
8. You could use “sudo su – ” to gain the root access for the instance.
All the pubic could instances are using the private to add the
additional security. Using the similar method, you should be able to
connect to any public could instances once you have the public IP and
private key file. Hope this article is informative to you.
This article will walk through to create the first AWS instance and
launch it. We will also see that how to access the AWS instance from
internet. Configure the virtual firewall to protect the instance from
different external attacks by restricting the number of allowed ports.
You could also protect the instance against the accidental termination.
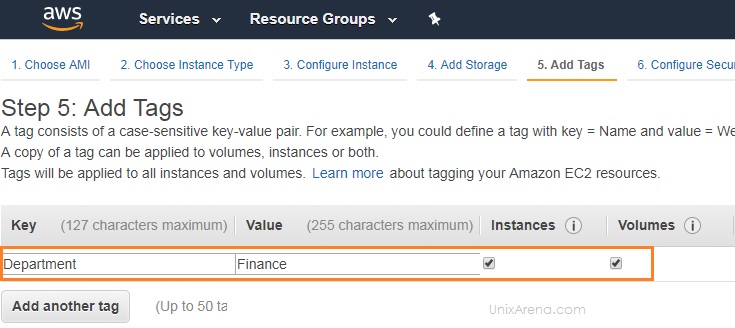
By adding more tags to the instances, you could easily determine the
cost and department. Let’s start the demonstration.
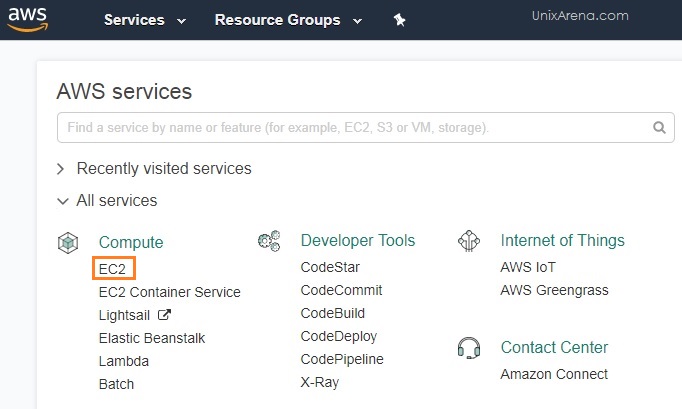
1. Login to the amazon AWS console.
2. From the AWS services , please click on EC2. EC2 Amazon AWS
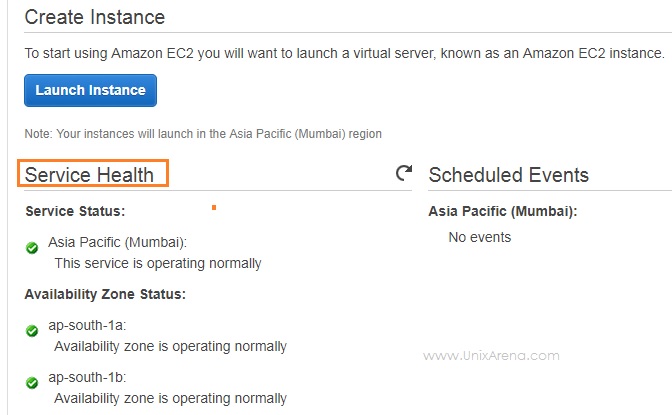
3. You could check the EC2 service status on your zone. AWS – Service Health
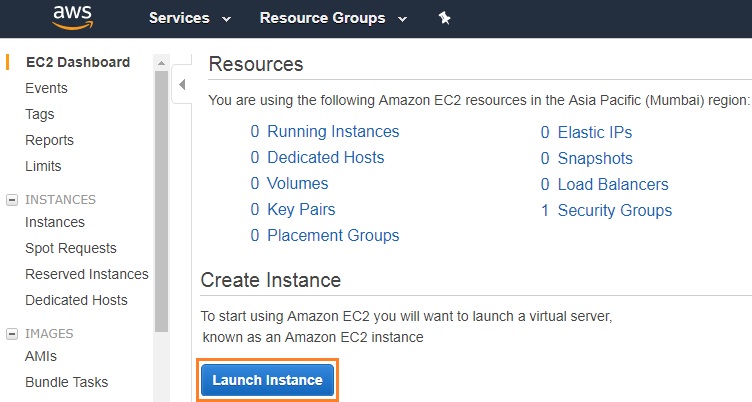
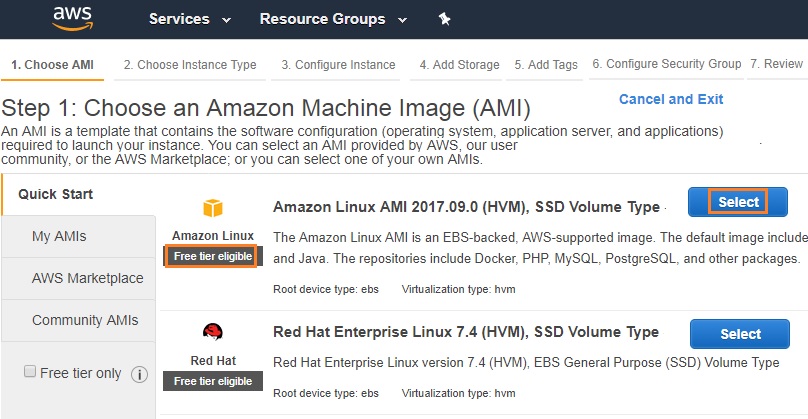
4. Click on “Launch instance” tab . Launch Instance – AWS
5. Select the any one of the Free Tier eligible image. (If you don’t want to be charged.) Select Free Tier eligible instance – Amazon Linux
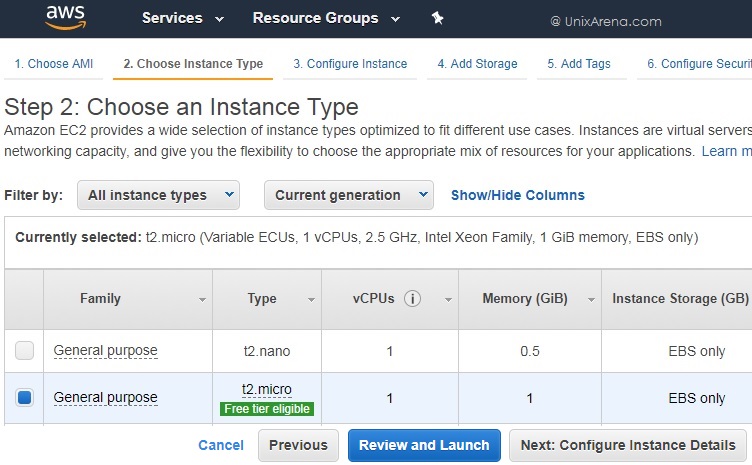
6. Choose an AWS EC2 instance type. Choose AWS Instance Type
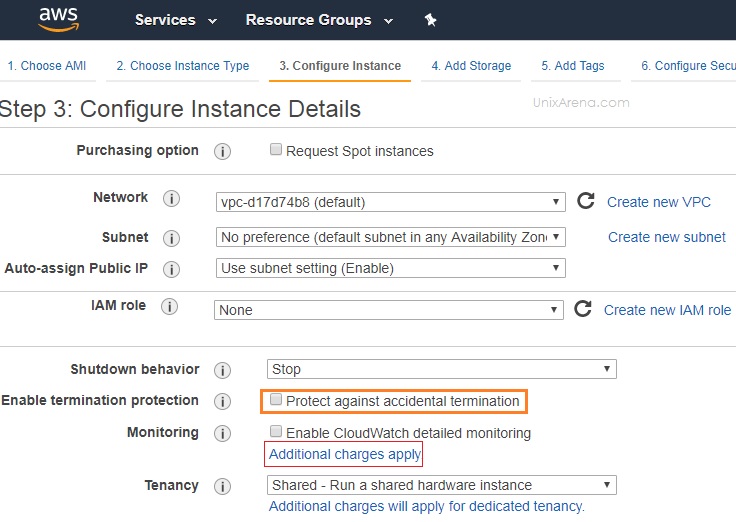
7. Configure instance details like network and other optional settings. Configure Instance Details – AWS
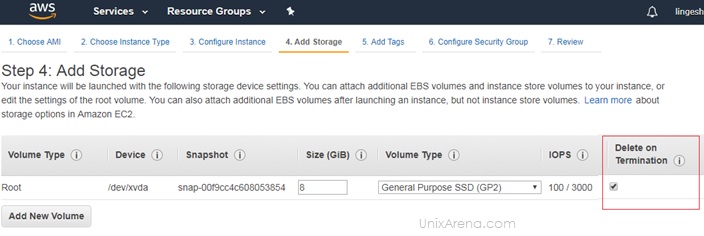
8.This section is required if you need to add additional storage. Add Storage – AWS Instance
9. Add the required tags. Add Tags to the AWS Instance
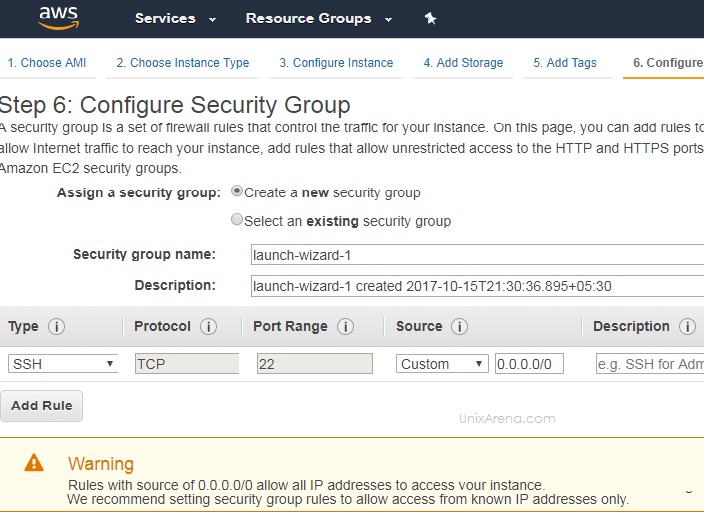
10. Configure the security groups. Since its first instance, I
haven;t configure the additional security. It’s open to the internet on
port 22. Configure Security Group – AWS instance
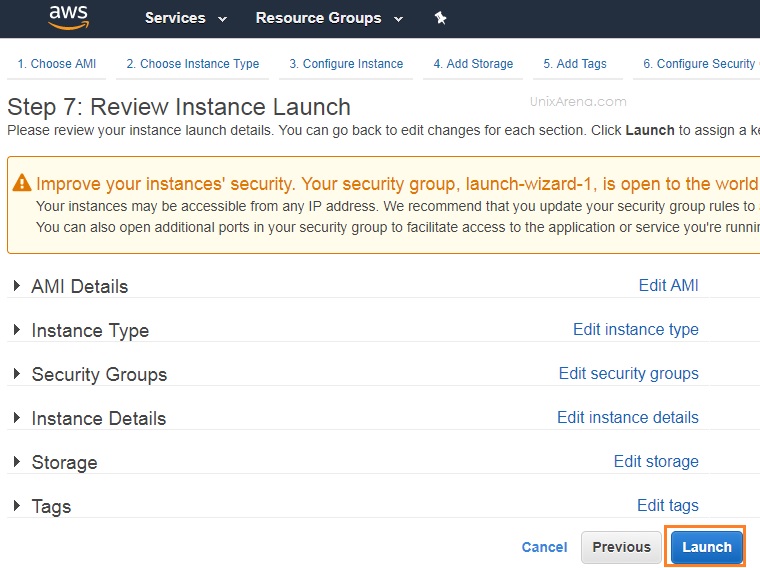
11. Review and launch the AWS EC2 instance. Review Instance Launch – AWS
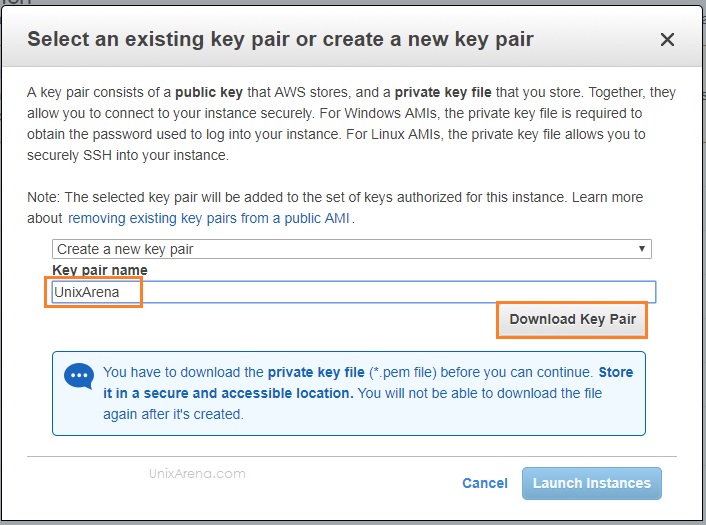
12. Create a new key pair and download it. Create a new key pair and Launch instance
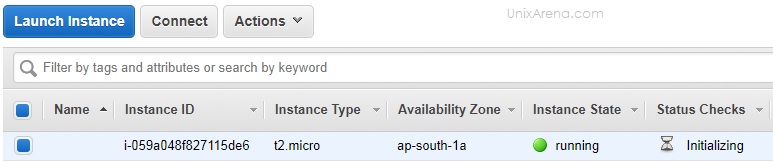
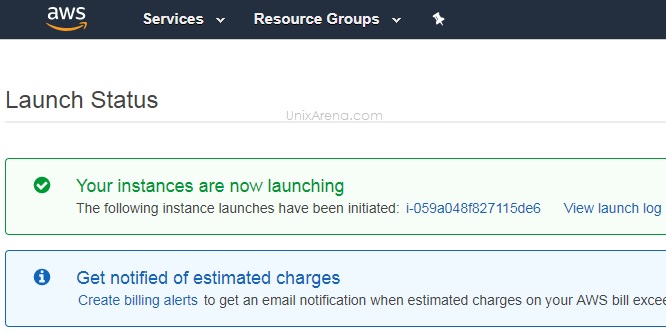
13. On the successful launch of the instance , you could see like below. Launch Status – AWS EC2
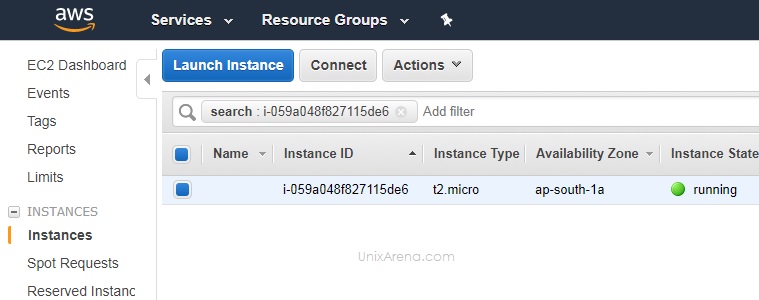
14. If you click that instance id , you can see the instance status. AWS instance status
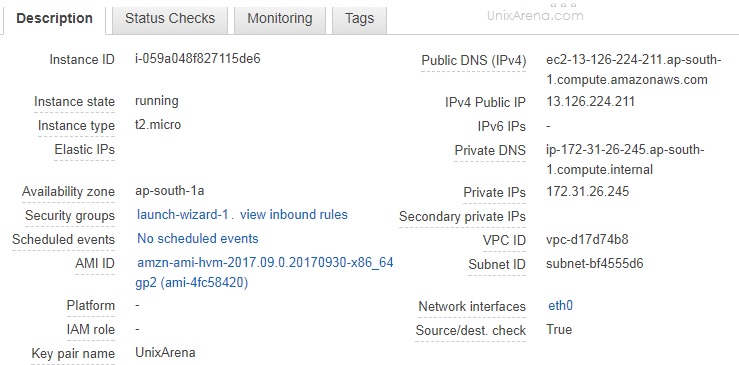
15. In the instance description section , you could see that public IP and DNS for the instance. AWS EC2 Details
Using the Public IP, You should be able to connect the instance from
internet. In the next article, we will see that how to connect to the
instance using the private key from windows laptop.
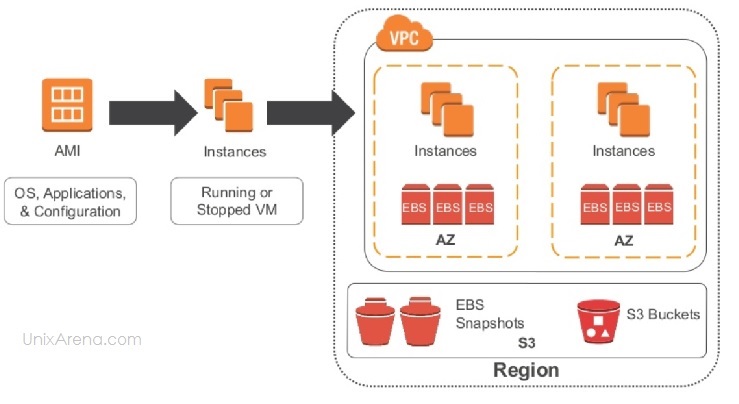
This article will walk through about Elastic Block Store (EBS) volume and it’s use cases. The last article walk through about EC2 and different prizing options and various type of EC2 instances
available in Amazon Public cloud. Before launching the first EC2
instance , you must know about EBS and it’s use. Amazon EBS is
persistent block storage volume which is mostly used to install the
operating system, install the database and wherever the block level
storage is required. It can also be the primary choice for low latency
interactive applications that demand high IOPS and predictable
performance. Each Amazon EBS volume is automatically replicated within
its Availability Zone to protect you from hardware failure (Ex: Disk ,
Storage array), offering high availability.
Here is the list of Amazon EBS volumes available :
EBS General Purpose SSD (gp2) Volumes
EBS Provisioned IOPS SSD (io1) Volumes
EBS Throughput Optimized HDD (st1) Volumes
EBS Cold HDD (sc1) Volume
EBS Snapshots
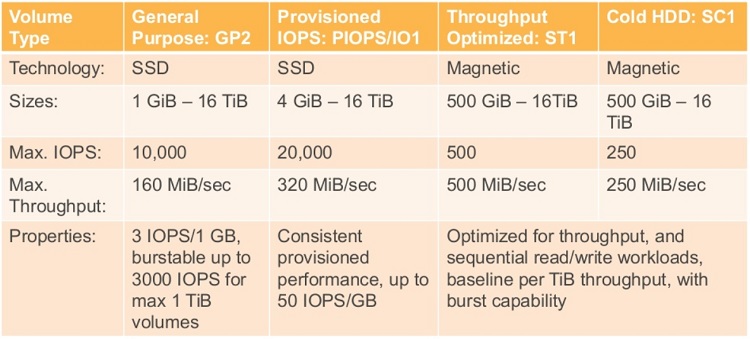
EBS General Purpose SSD (gp2) Volumes:
EBS general purpose volumes are most often used in Amazon EC2 since
its balances both prize and performances. It uses SSD in the backed, so
the hardware failure are very rare. The solid state drives will always
provides the reliable performance over the traditional HDD’s. Volumes
is charged by the amount you provision in GB per month, prorated to the
hour, until you release the storage. I/O is included in the price of the
volumes, so you pay only for each GB of storage that you provision it.
Charges = Pay only for the Number of GB that you have provision.
EBS Provisioned IOPS SSD (io1) Volumes:
What is different here from the EBS general purpose SSD volumes ? If
you need more than 10,000 IPOS , you need to choose “EBS provisioned
IOPS SSD” volumes. It have capability to serve up to 20,000 IOPS which
is much more faster than GP2 volumes. On this volume , amazon charges
for number of IOPS you make on this volume. This volume will fit for
busy databases where it requires more IPOS .
Charges = Number of GB that you have provision + Per provisioned IOPS-month.
EBS Throughput Optimized HDD (st1) Volumes:
It uses spinning disks in the backed and cost of the volume will be
lesser than the SSD one. There is no additional charges for IOPS. I/O
is included in the price of the volumes, so you pay only for each GB of
storage that you provision it. Its a low cost storage option and it can
be used for Big data, Data warehousing , Log processing . You can’t use
HDD volumes as boot volumes for any type of instances.
Charges = Pay only for the Number of GB that you have provision.
EBS Cold HDD (sc1) Volume:
Its lowest cost storage volume where its used for infrequent data
(Ex: File server, archival data ) access type. I/O is included in the
price of the volumes, so you pay only for each GB of storage that you
provision it.
Charges = Pay only for the Number of GB that you have provision.
Quick Summary:
AWS EBS storage Types
EBS Snapshots:
EBS snapshots is nothing but storing the EBS volume snapshot on S3
bucket. For the first time snapshot , it save the complete volume in S3
bucket. Amazon charges only for the incremental snapshots you store
there after. If you have more data changes on the volume , the snapshot
size will increase. Copying the EBS snapshots is charged for the data
transferred across the AWS regions. EBS volumes and Snapshot
Hope you might get idea about the EBS storage and various type of EBS
storage options are available in Amazon Web services. In the upcoming
article, we will demonstrate that how to launch the EC 2 instance in AWS
cloud.
Amazon AWS offers compute space in the cloud. Elastic Compute Cloud
(EC2) is a web service that provides re-sizeable compute capacity in the
cloud on demand basis. To setup the on-premise computing will take
minimum couple of months to make it operational. But in the cloud
service based computing will be available in few minutes. Here is the list of Amazon’s EC2 different prizing models offered by:
In On Demand instance type prizing mode, you will be only paying for
the EC2 instances that you use. Recently Amazon have introduced the
per second billing for EC2 instances unlike hourly basis charges. On
this prizing model , you no need to plan for the spikes and utilization.
You will be paying how much resource you use. Earlier Pricing is per instance-hour consumed for each
instance, from the time an instance is launched until it is terminated
or stopped. Each partial instance-hour consumed will be billed as a full
hour. Use cases : Un-predictable work loads, No upfront fee cases, Testing application on amazon instance for first time and temporary instances.
EC2 Reserved Instances:
EC2 reserved instances allows you to reserve the capacity for more
predictable workloads. Off-course on demand instance also will serve the
required capacity but you will get up to 75% discount by using the
reserved instances . The prizing also depends on instance type ,
availability zone, capacity and platform. Any factor decides the prizing
is committing the resources for certain period. If you reserve the
instance for an year , you will get up to 54% discount and if you
reserve the instance for for three year , you will get update to 60%
discount. Paying full upfront fee will have more saving than paying
monthly basis.
EC2 RI offers the market place to sell the reserved instances to third party if you not using it . Use cases: Predictable workloads and forecast
instance tenure. Application that requires reserved capacity. Users who
can pay up-front fee that can reduce the instance cost further.
Spot instances:
You can bid on spare Amazon EC2 computing capacity for cheaper
prizing using Amazon EC2 Spot instances. The Spot instance prize
fluctuates based on the supply and demand of available unused Amazon EC2
capacity. If you are planning to get the spot instance, you need to
specify the maximum amount you are willing to pay for the instance.
once the ec2 spot instance is launched , it will allow to run until the
spot instance prize is not exceeding the prize you have defined. If the
spot prize goes up than your defined prize, instance will be terminated
automatically.
Amazon guarantees that you will not be charged for more than what you
have bid. At the same time , instances will not be terminated if the
bid prize is higher than the spot instance prize. You must specify the
end duration of the instances.
If the Spot price exceeds your specified price, your instance will
receive a two-minute notification before it is terminated, and you will
not be charged for the partial hour that your instance has run.
Please refer the following link to know the current spot instance prizing. https://aws.amazon.com/ec2/spot/pricing/
Use cases : Application that have flexible start and
stop times. Applications which can’t afford standard Amazon instance
fee. Research companies data simulation with low cost.
Dedicated hosts
Dedicated hosts are mostly used to fulfill the corporate compliance
and regulatory requirements. This will also help you to use your
existing server-bound software licenses. It can be purchased on
On-demand prizing model . You will have great visibility to place the
amazon instances when you have dedicated hosts available. You have
visibility of the number of sockets and physical cores that support your
instances on a Dedicated Host. This will help to manage the software
licensing.
EC2 Instances Types:
Amazon offers different type of instances based on your workload.
Here is the list of instance type currently available in latest
generation of EC2.
F- Hardware Accelaration for your code.
P – Graphsics related applications , Machine learning
G – Graphics intensive , 3D accelration
We have seen the different Amazon EC2 prizing model and various
instance types on this article. In the upcoming article ,we will see
that how to launch the EC2 instance from Amazon web portal.
Amazon AWS – S3 (Simple Storage System) provides the lifecycle
storage management system to reduce the operating cost by moving the
data in to different storage classes (“S3 – IA” & “Glacier-
Archive” are cheaper storage compare to S3). At the same time , AWS also
provides the robust automatic system which enables to move the data
from one storage to another using the defined rules (XML format). There
are two important actions performed by lifecycle management system.
Transition actions:
Moving the objects from one storage to another storage based on the
rules which you have created. For an example, if you would like to move
the files which 30 days older from s3 standard to S3 – IA storage , you
could define in rules. Rest of the things will be taken care by AWS.
Expiration actions:
You could set the expiry date for the objects which are no longer
required after certain period. Amazon S3 deletes the expired objects on
your behalf.
Where to utilize the Amazon S3 Lifecycle Management ?
Application logs which are required after certain period of time.
Documents which are accessed for limited period of time. After that, these documents are less frequently accessed.
Health care records, financial documents and data that must be retained for regulatory compliance.
Note: Glacier is not available in the following
highlighted datacenters. So Please do not create S3 bucket on these
datacenters if you are planning to use lifecycle management. Glacier DataCenter options
Let’s see the demonstration of Amazon S3 Lifecycle Management:
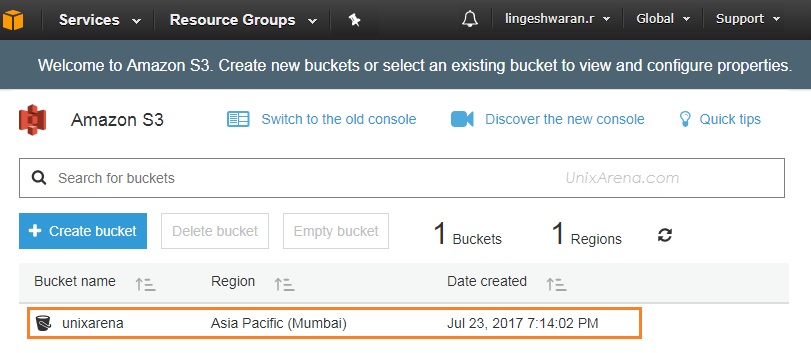
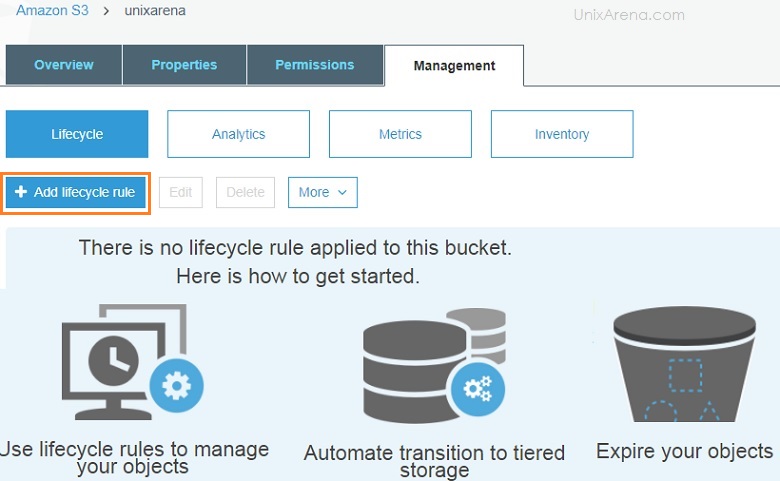
1. Navigate to S3 and see the existing bucket. Bucket Listing
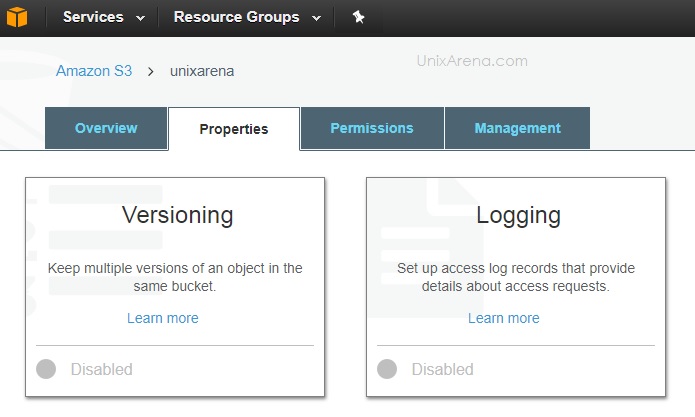
2. Navigate to the bucket properties tab. Enable the versioning for the bucket. Enable Versioning – AWS S3
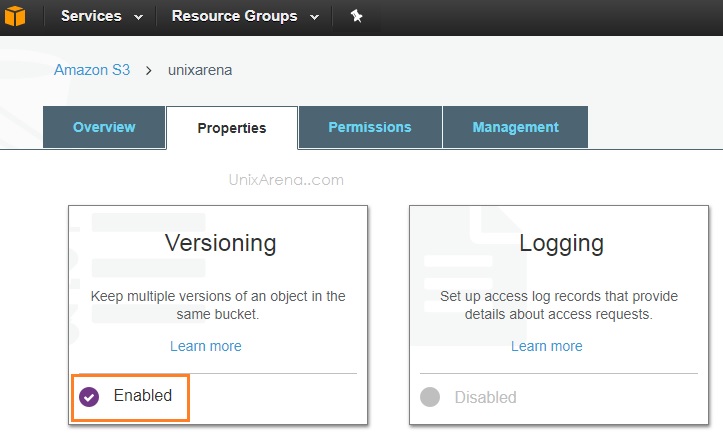
3. Click on the versioning (Disabled – Radio button) to enable it . Enable Versioning – AWS S3 3
4. Navigate to bucket management tab and Click on “Add Life Cycle Rule” . Add Lifecycle Rule -S3
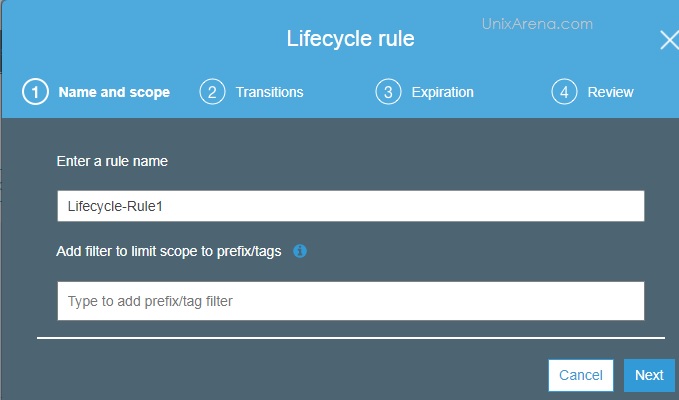
5. Enter the life cycle rule name. Enter Lifecycle Rule Name
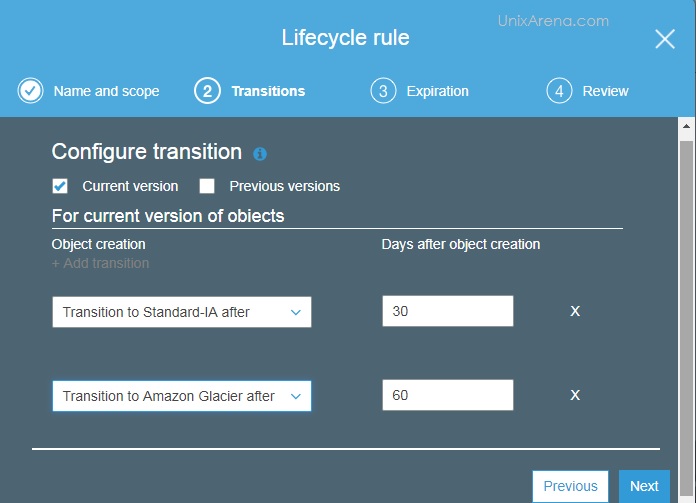
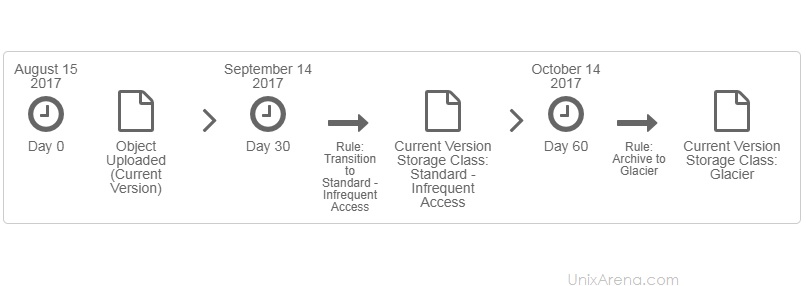
6. Click on “Current Version” to configure the object transition. Configure Transition – S3 – Lifecycle Management
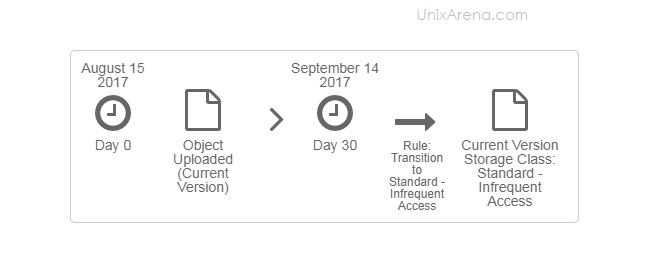
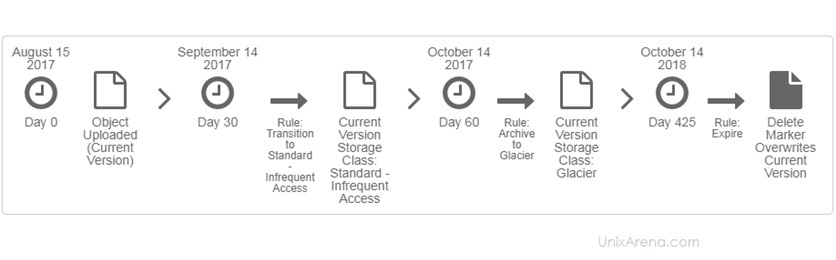
The following diagram would make you understand better.
Transition to STANDARD-IA storage after 30 days .
Diagram – Move objects after 30 days to Standard – IA
Transition to Amazon Glacier after 60 days .
Diagram – Move objects after 60 days to Glacier
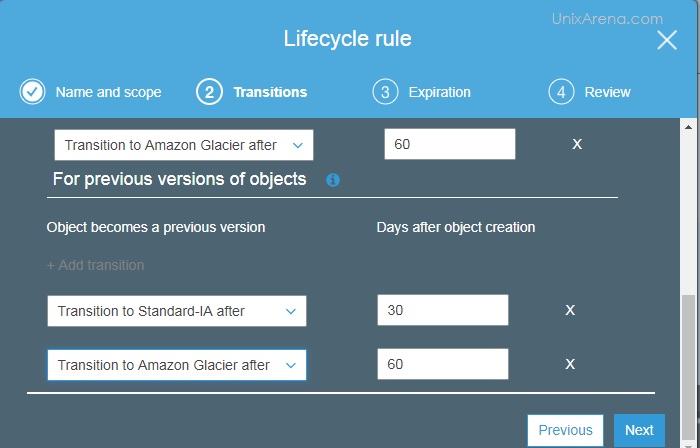
7 . Click on “Previous Version” to configure the object transition. Configure Transition – For Previous version Object
Please refer the following diagrams.
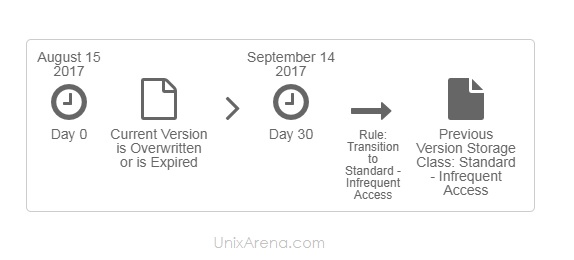
Transition to STANDARD-IA storage after 30 days for previous version items .
Diagram – Previous Version – Life Cycle.
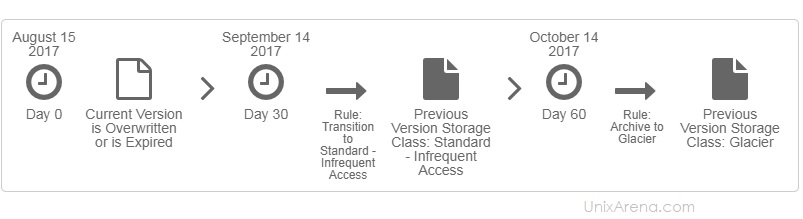
Transition previous version items to Amazon Glacier after 60 days .
Diagram – Previous Version Archive to Glacier
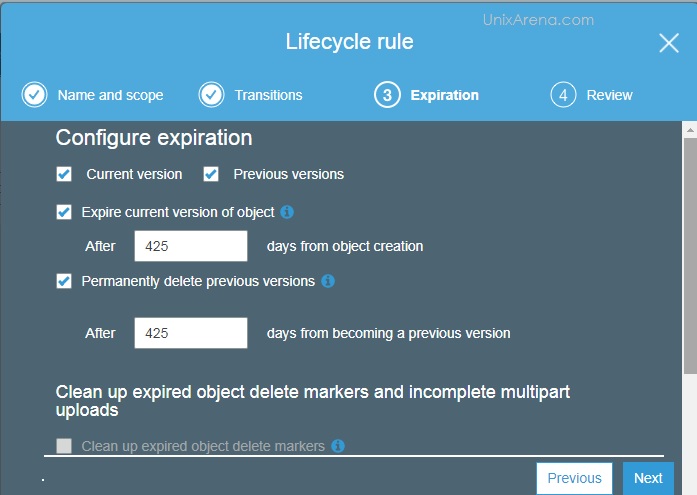
8. Configure the object expiry for both current and previous versions. Configure object expiration
The below flow charts will explain better. Delete the files after 425 days – Current versionDelete the files after 425 days – Previous version
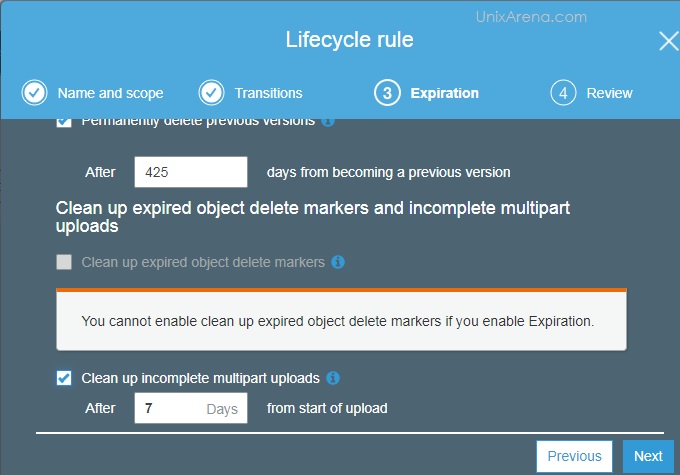
9. You could also have option to clean up the incomplete uploads to save the storage space. Delete the incomplete multi-part uploads
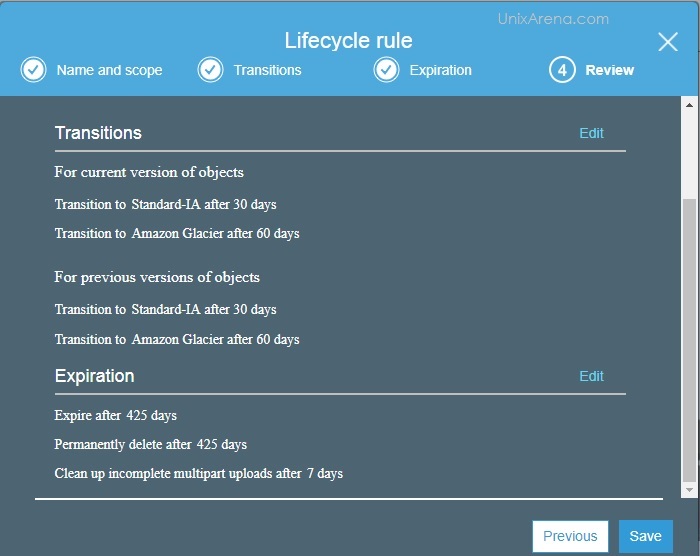
10. Review the life cycle rule for bucket “unixarena” & save it . Review S3 Lifecycle Rule